
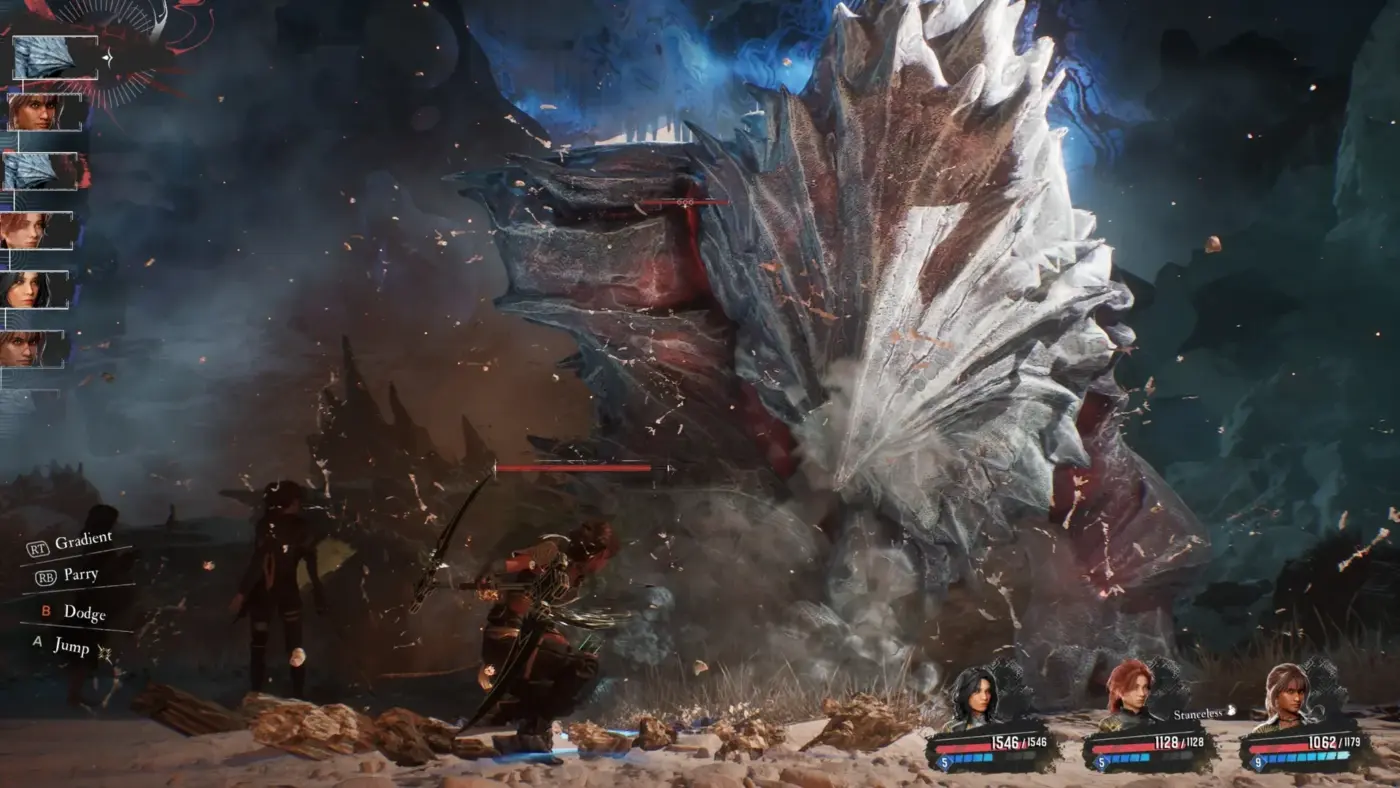
Clair Obscur: Expedition 33 Best Builds for Every Character
A current-patch build guide for Gustave, Lune, Maelle, Sciel, Verso, and Monoco, with weapons, attributes, skills, Luminas, combat loops, and party compositions.
Quick Answer: The best practical Clair Obscur: Expedition 33 builds are Gustave’s Lanceram Overcharge setup, Lune’s Trebuchim Stain/Mayhem setup, Maelle’s Burn-to-Virtuose setup with Medalum early and Esquium late, Sciel’s Charnon Permanent Twilight setup, Verso’s reliable Lanceram Rank C setup, and Monoco’s Ballaro support setup. Build attributes around the equipped weapon’s scaling instead of copying a fixed stat sheet. For a forgiving three-person party, use Lune, Verso, and Maelle; for an optimized endgame Burn team, use Verso, Sciel, and Maelle.
Current version: This guide was checked on August 31, 2026 against the latest numbered official announcement, patch v1.5.6. It includes weapons and Luminas introduced with the v1.5.0 Thank You update. The builds apply to the current PC, PS5, and Xbox Series X|S versions; no recommendation depends on a platform-specific control or graphics feature.
What are the best builds in Clair Obscur: Expedition 33?
The best all-purpose builds give every character one clear job, follow the equipped weapon’s scaling, and preserve enough AP and survivability to repeat their main combat loop. Use the table as a loadout shortlist, then read the matching section before spending attributes or scarce Lumina Points.
| Character | Recommended build | Weapon | Attribute priority | Main loop | Stage |
|---|---|---|---|---|---|
| Gustave | Overcharge | Lanceram | Weapon scaling, then Luck and Might | Build Charges with multi-hit skills, Mark, then spend a full Overcharge | Progression |
| Lune | Elemental Mayhem | Trebuchim | Vitality, Luck, Agility | Generate Stains with Free Aim, then cast Mayhem or Elemental Genesis | Early to late |
| Maelle | Burn/Virtuose | Medalum early; Esquium late | Weapon scaling; Esquium favors Agility, Defense, then Might | Apply Burn, enter Virtuose, then spend the setup on a heavy attack | Progression to endgame |
| Sciel | Permanent Twilight | Charnon | Defense and Luck, then Might/Agility | Apply Foretell, enter Twilight, then extend it with Twilight Dance | Late game |
| Verso | Rank C | Lanceram | Luck, Agility, Vitality, then Might | Use the Rank floor to recover quickly and keep enhanced skills online | General use |
| Monoco | Ballaro support | Ballaro | Agility and Defense, then Might | Rotate masks while feeding buffs, healing, and AP to the party | Late game |
These are recommendations, not an official developer tier list. Sandfall’s game description explicitly frames builds around gear, stats, skills, and character synergies, while timing dodges, parries, counters, and Free Aim remains part of the result. That hybrid approach is also why the game sits a little outside a rigid CRPG-versus-JRPG label.
How should you allocate attributes for any build?
Match attributes to your current weapon’s two scaling stats first, then buy the survivability, turn speed, or critical chance the build needs to execute reliably. Do not copy an endgame screenshot point for point at a lower level.
- Start with weapon scaling. A weapon swap can change the correct attribute priority even when the character and skills stay the same.
- Keep enough Vitality or Defense to survive a missed reaction. A theoretical damage gain is worthless if one failed parry removes the character before their next turn.
- Use Agility for tempo, not as a blind universal dump stat. Extra turns matter most when they create Stains, Foretell, Burn stacks, buffs, or healing before an enemy acts.
- Invest in Luck when the loop specifically rewards critical hits. Gustave’s Charge generation, Lune’s multi-hit elemental skills, Sciel’s Charnon effects, and Verso’s offense all have a reason to value Crit.
- Add Might after the build functions. It improves damage, but it does not replace the weapon scaling, AP economy, stance setup, or status application that makes the loadout work.
This “make the engine work before maximizing the number” rule applies across RPG build systems. Our Elden Ring Strength build, for example, likewise fixes survivability, load, and weapon requirements before spending every remaining point on damage.
What is the best Gustave build?
Gustave’s best progression setup is an Overcharge build with Lanceram, using Lumiere Assault and Strike Storm to build Charges before spending a full meter on Overcharge. Marking Shot gives the next heavy hit—or a teammate’s hit—a stronger target.
Gustave Overcharge loadout
- Weapon: Lanceram
- Core skills: Overcharge, Lumiere Assault, Strike Storm, Marking Shot
- Flex skills: Shatter for groups; Powerful for a party damage buff
- Pictos priority: Dead Energy II, Augmented Attack, Marking Shots
- Lumina priority: Energising Start I or II, Burning Shots, Versatile
- Attributes: Follow Lanceram scaling first; add Luck for critical hits and Might for direct damage
The execution is simple: use Lumiere Assault when its multiple hits can generate extra Charges through criticals, use Strike Storm for dependable Charge gain, and fire Overcharge when the meter is full. If the target is not already Marked, Marking Shot sets up the burst. Against a pack, Shatter may be a better spend than forcing single-target Overcharge damage into the wrong situation.
Do not hold a full meter forever while waiting for a perfect window. The point of the build is to refill it repeatedly. AP-start and on-kill effects help Gustave return to Strike Storm, but the loadout still works before every listed Pictos or Lumina is available. The underlying loadout and sequence are corroborated by IGN’s current Gustave build reference.
What is the best Lune build?
Lune’s best adaptable build is Elemental Mayhem with Trebuchim: generate Stains through Free Aim, then consume the right pattern with Mayhem or Elemental Genesis. Keep a healing skill in a flex slot when the party needs recovery more than another elemental option.
Lune Elemental Mayhem loadout
- Weapon: Trebuchim
- Core skills: Mayhem, Elemental Genesis, Thermal Transfer, Electrify
- Flex skills: Thunderfall, Lightning Dance, Elemental Trick, Wild Fire, Rebirth
- Pictos priority: Energising Start, Rewarding Mark, Augmented Aim
- Lumina priority: Marking Shots, Energising Turn, Sniper, Burning Shots, Critical Burn, Dodger
- Attributes: Vitality and Luck first for Trebuchim’s plan, with Agility for more turns
- Use Free Aim to generate Stains through Trebuchim. Free Aim can also apply Mark or Burn when the matching Luminas are equipped.
- If Lune has four different Stains—or Light Stains filling the missing colors—and enough AP, cast Elemental Genesis for heavy area damage.
- If four Stains are available but the pattern is wrong, use Mayhem for strong single-target and Break pressure.
- Use Thermal Transfer only when its Burn and Stain conditions are met; it is an AP conversion tool, not a button to press every turn.
- Use the remaining skill slots to cover the encounter: Rebirth for recovery, Thunderfall for groups, or Elemental Trick when reliable Stain setup matters more than immediate damage.
When should Lune switch to a healer build?
Switch Lune to Snowim, Rebirth, and Revitalization when failed reactions or long boss phases are ending attempts before the damage engine can stabilize. Snowim’s defensive effects, Vitality/Agility investment, recovery Pictos, and healing Luminas turn Lune into a safety net rather than a primary damage dealer. Typhoon, Wild Fire, Terraquake, and Elemental Genesis can fill the remaining slots according to the fight.
The full Mayhem and healer alternatives, including the conditional Thermal Transfer sequence, are documented in IGN’s Lune build guide. Treat its sample attribute totals as examples, not universal targets.
What is the best Maelle build?
Maelle’s best scalable build applies Burn, moves into Virtuose Stance, and spends that damage window on a hard-hitting skill; Medalum is the practical progression weapon, while Esquium is the post-v1.5.0 endgame upgrade for the Burn-stack nuke plan.
Maelle progression Burn/Virtuose loadout
- Weapon: Medalum
- Core skills: Swift Stride, Percee, Mezzo Forte
- Later damage options: Burning Canvas, Stendhal, Phantom Strike
- Setup Pictos: Burning Shots and Marking Shots
- Attributes: Follow Medalum’s scaling; Agility and Defense support frequent, safer Virtuose turns
Apply Burn with a Free Aim shot or a teammate, then use Swift Stride to enter Virtuose consistently. Percee is a practical early payoff, especially against a Marked target. Mezzo Forte is the maintenance option when the perfect attack is not yet funded. Do not spend every turn forcing a stance transition if the party can apply Burn or provide the opening for you.
Maelle endgame Burn-stack loadout
- Weapon: Esquium
- Core payoff: Burning Canvas
- Stance insurance: Swift Stride
- Attributes: Agility, Defense, then Might under Esquium’s scaling
- Team: Verso for rapid Burn application, Sciel for buffs and turn economy
Have Verso build Burn stacks, use Sciel to improve the team’s tempo, and let Maelle target the stacked enemy with Burning Canvas while in Virtuose. This is a setup-and-cash-out composition, not three independent damage characters. If the setup is interrupted, Swift Stride restores the stance plan instead of gambling the entire turn on an ideal sequence.
Patch 1.5.6 corrected a bug that could let a stunned enemy act immediately after Burn was applied. The fixed interaction makes it especially important not to copy old advice that treated that behavior as normal. IGN’s Maelle build page records the v1.5.0 move from Medalum to Esquium for this endgame variant.
What is the best Sciel build?
Sciel’s best late-game build is Permanent Twilight with Charnon: apply Foretell, consume it to enter Twilight, then use Twilight-enhanced skills and Twilight Dance to extend the state rather than rebuilding from zero each turn.
Sciel Permanent Twilight loadout
- Weapon: Charnon
- Core skills: Focused Foretell, Sealed Fate, Dark Wave, Twilight Dance
- Damage flex: Phantom Blade or Final Path
- Pictos priority: Energising Turn, Energising Parry, Charging Critical
- Lumina priority: Critical Break, Cheater, Energising Start, Painted Power, Roulette
- Attributes: Defense and Luck first, then Might and Agility
- Open with Focused Foretell on the priority target.
- Use Sealed Fate to capitalize on Foretell and enter Twilight.
- Use Dark Wave or another Twilight-enhanced attack when damage or area coverage is needed.
- Use Twilight Dance before the state expires to extend the damage window.
Charnon’s Twilight critical behavior makes Luck and critical-trigger Luminas coherent, while Defense keeps Sciel alive long enough to protect the rotation. Cheater makes the loop much smoother after it becomes available, but it is not a reason to leave the build without AP support. Before Charnon and late-game Luminas, use Scielson as the lower-risk option and focus on clean Foretell application rather than pretending the endgame loop is already complete.
IGN’s Sciel build reference supplies the Charnon sequence and distinguishes it from the much riskier Chation solo setup. For a general party guide, Permanent Twilight is easier to integrate than a solo-only Last Stand package.
What is the best Verso build?
Verso’s best general-purpose build uses Lanceram to keep his Rank from falling below C, reducing the recovery cost after taking damage and keeping Rank-enhanced skills useful even when every parry is not perfect.
Verso Rank C loadout
- Weapon: Lanceram
- Core skills: Assault Zero, Strike Storm, Marking Shot, Perfect Recovery, Berserk Slash
- Pictos priority: Charging Critical, Marking Shots, Breaking Attack
- Lumina priority: Energising Parry, Healing Counter, Teamwork, Roulette, Auto Rush
- Attributes: Build enough Luck for reliable criticals, then prioritize Lanceram’s Agility/Vitality scaling and add Might
Open with the move that best fits the field instead of following one rigid script. Marking Shot supports Maelle or another burst character; Assault Zero and Strike Storm exploit the Rank C baseline; Perfect Recovery is the reset when damage lands. Successful parries accelerate AP and Rank recovery, but Lanceram keeps one missed timing from collapsing the whole build.
When is Simoso better?
Use Simoso for a late-game Light/Burn specialist after you can support its skill and Lumina package. Perfect Break, Radiant Slash, Phantom Stars, Follow Up, and Purification pair with Burn Affinity, Charging Burn, Double Burn, Critical Burn, and Burning Shots. It has a higher acquisition and setup burden than Lanceram, so it is an alternative for a developed roster, not the default answer for every player.
The Rank C and Simoso alternatives are detailed in IGN’s Verso build guide. The safer Rank C variant is the better recommendation when consistency matters more than a specialized ceiling.
What is the best Monoco build?
Monoco’s best party build is Ballaro support: use skills across multiple masks to keep the Bestial Wheel useful while supplying buffs, healing, weakness coverage, and AP to the other two active characters.
Monoco Ballaro support loadout
- Weapon: Ballaro
- Core skills: Troubadour Trumpet, Clair Enfeeble, Abbest Wind, Contorsionniste Blast, Jar Lampstorm
- Additional support options: Potier Energy, Boucheclier Fortify
- Pictos priority: Energising Parry, Combo Attack III, Second Chance
- Lumina priority: Painted Power, Weakness Gain, Energy Master, Cheater, Energising Start I
- Attributes: Agility and Defense first, then Might
Ballaro rotates the Bestial Wheel in reverse, so check the next mask before selecting a skill. Abbest Wind covers the Agile position and can provide tempo; Troubadour Trumpet supplies a party buff; Contorsionniste Blast covers recovery; the remaining attacks prevent Monoco from becoming dead weight when support is already active. Ballaro’s upgraded-skill and Almighty effects can also feed AP to allies after the weapon reaches the relevant upgrade thresholds.
When should Monoco use Joyaro instead?
Use Joyaro for an Almighty damage build only when you are comfortable avoiding damage and planning a route back to Almighty Mask. Duallist Storm, Sakapatate Fire, and Lampmaster Light are the core Almighty attacks, while Benisseur Mortar can help return to Almighty against a Marked target. Full Strength and other “avoid damage” effects raise the ceiling but make missed reactions more expensive.
IGN’s Monoco build reference supports both paths. Ballaro is the recommendation here because a flexible party slot helps more players than a fragile maximum-damage setup.
What are the best team compositions?
The best team is the trio whose setup actions feed the same payoff; do not simply combine the three characters with the highest individual damage screenshots. These three templates cover progression, optimized status damage, and flexible support.
Best forgiving progression team: Lune, Verso, Maelle
- Lune: Generates Stains, applies Burn through Wild Fire or Burning Shots, and carries Rebirth or another recovery option.
- Verso: Marks targets, provides steady damage, and recovers from mistakes through the Rank C floor.
- Maelle: Uses the supplied Burn and Mark to enter Virtuose and deliver the main burst.
This trio has damage, Mark, Burn, Break options, and recovery without requiring every late-game Pictos. It is the best starting point if you want one party to handle varied encounters while the roster is still developing.
Best endgame Burn team: Verso, Sciel, Maelle
- Verso: Uses the appropriate Burn-focused setup to stack Burn quickly.
- Sciel: Improves tempo and buffs the damage characters while contributing Foretell/Twilight damage.
- Maelle: Enters Virtuose and uses Burning Canvas as the payoff against the stacked target.
This is the strongest evidence-backed specialization in the guide, but it is gear- and execution-dependent. It is not the right answer when the enemy punishes long setup, resists the intended damage plan, or demands more healing.
Best flexible support team: Lune, Maelle, Monoco
- Lune: Chooses elemental damage or healing based on the encounter.
- Maelle: Remains the primary single-target payoff.
- Monoco: Covers buffs, debuffs, healing, AP, and weaknesses through Ballaro and the Bestial Wheel.
This composition trades Verso’s reliable Mark/Rank damage for broader support. Add Marking Shots to a Free Aim user if Maelle’s chosen attack depends on Mark.
Expedition 33’s combination of turn planning and reaction timing belongs to the broader modern turn-based RPG comeback, but its party building is unusually sensitive to what happens during enemy turns. Pick the team you can execute, not only the one with the best ideal sequence.
Which Pictos and Luminas should you prioritize first?
Prioritize AP economy and the effect that enables each character’s core loop, then add damage-cap, Crit, Burn, counter, or survival effects only when they solve a real limit. You do not need every listed Lumina to start using a build.
- Fund the opening. Energising Start, Energising Turn, or another appropriate AP source should let the first rotation happen.
- Add the setup effect. Marking Shots, Burning Shots, Double Burn, or Foretell/Crit support belongs only on the character that can use it efficiently.
- Protect the rotation. Healing Counter, Second Chance, Recovery, or a defensive option is valuable when a missed reaction regularly ends the plan.
- Remove the damage cap when it becomes a cap. Painted Power is an endgame priority after it is unlocked and the character is actually hitting the 9,999 ceiling; it does nothing useful for an underfunded rotation that never reaches that number.
- Add luxury damage last. Roulette, Glass Canon, and high-risk counter effects belong after AP, survival, and setup are stable.
The official patch 1.5.0 notes confirm that Lumina Sets can save up to 50 loadouts. Save separate progression, boss, and farming sets instead of rebuilding every slot before each encounter.
What common build mistakes should you avoid?
The most common mistake is copying an endgame loadout without its weapon passives, AP economy, unlocks, or party setup. A partial build should still complete one repeatable loop.
- Copying fixed stats after changing weapons: Recheck scaling whenever the equipped weapon changes.
- Equipping six expensive skills: Keep at least one low-cost action, setup move, or utility skill for weak AP turns.
- Running three setup characters: Every party needs someone who converts Mark, Burn, Foretell, Stains, buffs, or Break into immediate pressure.
- Using solo Pictos in a three-person party: Last Stand and Solo Fighter packages are not general party recommendations.
- Ignoring progression gates: Esquium, Charnon, Simoso, Joyaro, Ballaro, Cheater, and Painted Power are not starter assumptions.
- Treating Free Aim as filler: On Trebuchim Lune or a Mark/Burn setup character, Free Aim is part of the engine.
- Building only for perfect parries: If the player cannot execute the reaction consistently, choose Vitality, Defense, healing, or the safer weapon variant.
- Following obsolete bug behavior: Patch v1.5.6 fixed the Burn-after-Stun turn issue; do not plan around the old interaction.
How do you assemble one of these builds step by step?
Equip the weapon first, identify its scaling and passive, choose the four indispensable skills, then test whether the opening has enough AP before filling the remaining Pictos, Luminas, and flex skills.
- Choose one role: burst, sustained damage, Break, healing, or support.
- Equip the recommended weapon or the listed progression substitute.
- Spend attributes on that weapon’s scaling, then add the build’s survival and tempo priorities.
- Equip the core setup and payoff skills; leave the remaining slots flexible.
- Add enough AP generation to execute the first turn without depending on a lucky kill.
- Add one defensive fallback if a missed dodge or parry commonly ends the attempt.
- Choose two teammates who provide the status, Mark, buff, healing, or Break the main damage character needs.
- Save the result as a Lumina Set, then make a second variant for bosses or groups.
Is this guide current for patch v1.5.6?
Yes. The guide was checked against Sandfall’s official v1.5.0 through v1.5.6 notes, with v1.5.6 the newest numbered patch announcement in the live official Steam feed as of August 31, 2026.
Patch v1.5.6 added Arabic text support and fixed several combat interactions: Burn applied after Stun, Cleim’s level-10 effect on area skills, Martenon effects when Sciel lacks consecutive turns, and an interaction where Sireso and the Powerful buff could override each other. None of the six baseline loadouts above relies on the broken version of those effects. The official notes also flag a PC crash workaround involving Global Illumination below Epic, but that graphics setting does not alter the build recommendations.
Refresh this page after any later patch that changes Burn, Stun, Foretell, Twilight, Virtuose, Perfection/Rank, Bestial Wheel, Charges, AP generation, weapon scaling, Lumina costs, or the damage cap.
Frequently asked questions
What is the best overall team in Expedition 33?
Lune, Verso, and Maelle are the best forgiving general team because they combine recovery, Mark, Burn, steady damage, and a clear Virtuose payoff. Verso, Sciel, and Maelle have a higher specialized endgame Burn ceiling but require more gear and setup.
Should every character use Painted Power?
No. Use Painted Power after it is unlocked and only on characters who are reaching the 9,999 damage cap often enough to justify the Lumina cost. AP, setup, or survival can be more valuable on a support character.
Are exact attribute numbers required?
No. Exact totals change with level, weapon, upgrade state, and available points. Follow the weapon’s scaling first, then the priorities listed for the character. The build’s loop matters more than reproducing one sample total.
Which build is best for beginners?
Use Lanceram Rank C Verso for reliable damage, Trebuchim Lune with Rebirth in a flex slot, and Medalum Maelle for the Burn-to-Virtuose payoff. This party works before the full endgame Lumina package and has room to recover from missed reactions.
Do these builds require perfect parries?
No. Parries improve AP, counters, and certain high-risk loadouts, but the baseline builds include safer paths: Rank C Verso, healer Lune, Defense investment on Maelle or Sciel, and Ballaro support Monoco. Favor dodges and survival effects until parry timing is consistent.
Do the builds work on PC, PS5, and Xbox Series X|S?
Yes. The recommendations use shared combat systems and content from the update released across all platforms and regions. Platform-specific performance settings do not change the weapon, skill, Pictos, or Lumina logic.